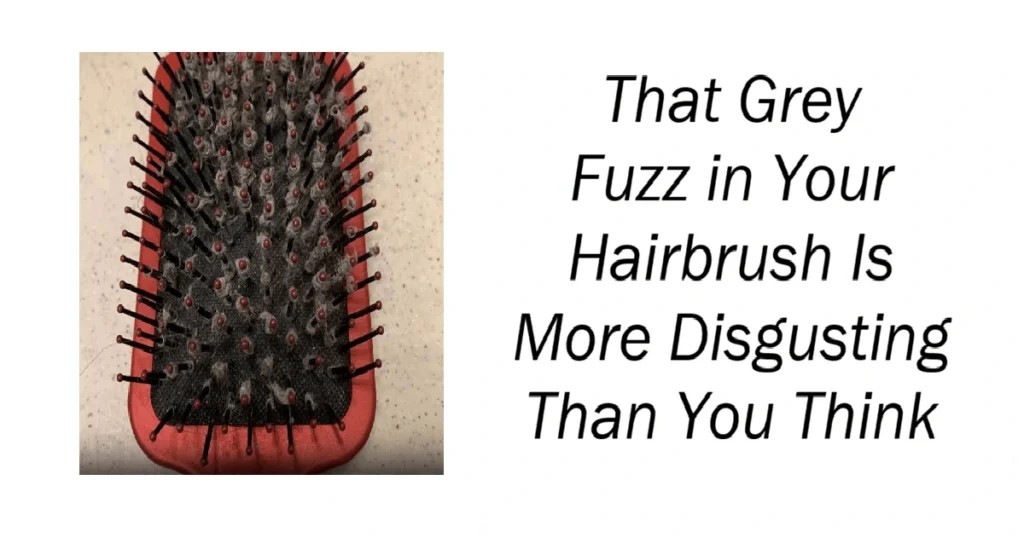
That grey fuzz trapped at the bottom of your hairbrush can be an unpleasant discovery. It may look like ordinary household dust, but it is usually a compact mixture of materials collected during everyday grooming. Loose hair, scalp oils, shed skin cells, airborne particles, and residue from styling products can all become caught between the bristles over time.
While the sight of it may be unappealing, the buildup is generally a normal consequence of using a hairbrush. Hair and skin naturally shed, and the scalp produces sebum, an oil that helps support the skin barrier and condition the hair. A brush is designed to move through the hair and distribute some of those natural oils, so it also inevitably gathers debris.
The practical issue is not that a small amount of residue appears after a few uses. It is that an uncleaned brush can gradually become coated with old oils, hair-product film, lint, and tangled strands. Regularly removing this buildup helps keep the brush effective, improves its appearance, and reduces the amount of residue that may be transferred back onto freshly washed hair.
What Is the Grey Fuzz in a Hairbrush?
The grey or greyish-white fuzz in a hairbrush is rarely one single substance. Its color and texture can vary depending on hair color, household dust, the products used, and the materials in the brush itself. In most cases, it contains a combination of the following everyday substances:
- Shed hair: It is normal to lose hair as part of the hair growth cycle. Loose strands often wrap around brush bristles and create a net that traps smaller particles.
- Dead skin cells: The outer layer of the skin naturally sheds cells continuously, including on the scalp. These tiny flakes can collect on brushes during grooming.
- Natural scalp oil: Sebum can coat the hair shaft and bristles. When mixed with dust and product residue, it can make buildup feel sticky or dense.
- Airborne dust and lint: Hair attracts particles from the surrounding environment, including textile fibers, dust, and other non-visible debris found in homes and workplaces.
- Haircare product residue: Dry shampoo, hairspray, mousse, gel, leave-in conditioner, oils, pomade, and heat-protection products can leave films that adhere to bristles.
Once these materials meet, they can bind together. Hair provides a physical structure, while oils and product residue help fine particles cling to it. This is why the buildup often resembles a soft, dusty clump rather than a simple collection of individual hairs.
Grey fuzz is especially noticeable on brushes with widely spaced bristles or light-colored cushioned bases. It can also appear more quickly in households with pets, carpeting, fabric upholstery, or high levels of dust. A brush left on a bathroom counter may collect particles from the room even when it is not being used.
Why Does Hairbrush Buildup Form So Quickly?
Hairbrush buildup can seem to return almost immediately after cleaning because brushing is a frequent and repetitive activity. Each pass through the hair can remove loose strands and move natural scalp oils along the hair shaft. This is not inherently a problem; brushing can help detangle hair and distribute oils. However, the same process leaves material behind on the tool.
People who use styling products may see residue develop more quickly. Many products are formulated to coat the hair temporarily to add hold, texture, shine, moisture, or volume. Some of that coating can transfer to the brush. When it combines with shed hair and dust, the material may appear darker, greyer, or more waxy.
Dry shampoo is another common contributor. These products are typically designed to absorb or reduce the appearance of oil between washes. If not thoroughly brushed out, powdery residue can collect on brush bristles alongside oil and skin cells. This does not mean dry shampoo is unsafe when used as directed, but it may mean the brush needs cleaning more often.
Hair type and grooming habits also matter. Long hair can create larger tangles around bristles, while curly or textured hair may require particular brush types and gentler detangling routines. Frequent brushing, brushing after workouts, and using a brush on hair that has been exposed to pollution, smoke, sand, or hair spray can all increase the rate of buildup.
Does a Dirty Hairbrush Affect Hair and Scalp Hygiene?
A visibly dirty brush is not automatically a health hazard, and there is no need to panic after noticing grey fuzz. Skin and hair naturally come into contact with microorganisms from the body and environment every day. However, hygiene experts generally recommend cleaning personal grooming tools because they can collect oils, skin debris, and residue over time.
A brush that is heavily coated with old product and oil may leave hair looking dull, flat, or less freshly washed. It can also make brushing feel less smooth, especially if hair is caught around the bristles. When bristles cannot move freely through the hair, people may be more likely to pull, tug, or repeatedly brush the same section. Excessive force can contribute to breakage, particularly in wet, chemically treated, heat-damaged, or naturally fragile hair.
Cleaning matters even more when a brush is shared. Personal items that touch the scalp, including brushes, combs, hats, and hair accessories, are best kept for individual use where possible. Sharing can transfer oils, product residue, and certain scalp-related concerns between users. If someone has a diagnosed scalp condition or an active infection, advice from a healthcare professional is more appropriate than relying on household cleaning alone.
For most people, the goal is simple maintenance rather than sterilization. A clean brush supports a tidier haircare routine and helps prevent old buildup from being redistributed through the hair.
How Often Should You Clean Your Hairbrush?
There is no single schedule that suits every person, because the right cleaning frequency depends on how often the brush is used, the length and texture of the hair, and the amount of product applied. Still, a regular routine can prevent the grey fuzz from becoming difficult to remove.
A useful approach is to remove trapped hair after each use or whenever it is visible. This takes little time and prevents loose strands from forming a web around the bristles. A more thorough wash can then be done periodically.
- Daily brush users: Remove loose hair frequently and consider washing the brush about once a week, especially if you regularly use styling products, dry shampoo, oils, or hairspray.
- Occasional brush users: A deeper clean every two to four weeks may be enough if the brush remains visibly clean and is used only by one person.
- People who use substantial product: Clean more often, since product films can accumulate quickly and make bristles feel coated.
- After illness or scalp concerns: Follow guidance from a qualified healthcare professional, particularly if there is a contagious condition or persistent scalp irritation.
The most practical rule is visual and tactile: if the brush contains noticeable hair, feels sticky, has visible lint, or no longer glides easily through clean hair, it is time to clean it.
How to Clean a Hairbrush Safely
The best cleaning method depends on the brush material. Plastic brushes are usually the easiest to wash, while wooden brushes, padded brushes, and natural-bristle brushes require more caution. Before cleaning, check any care instructions supplied by the manufacturer.
Step 1: Remove Loose Hair
Start by lifting out the hair trapped around the bristles. Fingers, the pointed end of a comb, or a dedicated brush-cleaning tool can work well. For dense tangles, carefully snip through the hair with scissors and pull it free in small sections. Avoid cutting too close to the bristles or cushion, as this can damage the brush.
Step 2: Make a Mild Cleaning Solution
For a washable plastic brush, add a small amount of gentle shampoo to a bowl of warm water. Shampoo is suitable because it is designed to remove oils and product residue from hair. Very hot water is unnecessary and may warp plastic or loosen adhesives in some brush designs.
Step 3: Clean Between the Bristles
Use a clean toothbrush, small cleaning brush, or soft cloth to work through the bristles and base. Focus on areas where residue is stuck to the brush. Gentle scrubbing is usually enough; aggressive scraping can bend bristles or tear a cushioned pad.
Step 4: Rinse Carefully
Rinse plastic brushes under clean running water until no shampoo or loosened debris remains. If the brush has a wooden handle, padded base, or natural bristles, do not soak it unless the manufacturer specifically states that it is safe. Instead, use a lightly dampened cloth or toothbrush to clean the surface, then wipe away residue with a clean damp cloth.
Step 5: Dry It Completely
Shake off excess water and place the brush bristle-side down on a clean towel, if its design allows. Drying with the bristles facing down can help prevent water from collecting in the base. Allow the brush to dry fully before using it again. Moisture trapped in a cushion or wooden handle can affect the material and shorten the brush’s lifespan.
What Not to Do When Cleaning a Hairbrush
Strong disinfectants and harsh household chemicals are not necessary for routine brush cleaning. They may irritate the skin if residue remains, damage certain brush materials, or leave an unpleasant odor. A mild cleanser and careful drying are generally sufficient for ordinary maintenance.
It is also wise to avoid soaking wooden brushes or brushes with padded bases. Water can swell wood, weaken glue, and create problems inside a cushioned brush where moisture is difficult to remove. For these designs, spot-cleaning is the safer option.
Do not use a brush again while it is damp. Apart from being uncomfortable, a damp brush may collect lint more easily and can be harder to keep in good condition. Keeping it in a dry, clean place between uses is a simple way to limit unnecessary dust buildup.
When to Replace Your Hairbrush
Cleaning can extend the useful life of a quality hairbrush, but no brush lasts forever. Consider replacing it if bristles are broken, sharp, bent beyond repair, missing in large numbers, or separating from the base. A damaged brush may snag hair or feel rough on the scalp.
You may also want a replacement if the brush retains an odor after proper cleaning, has a cracked or deteriorating cushion, or cannot be cleaned adequately because of its construction. Choosing a brush that suits your hair type and styling needs can make detangling more comfortable and reduce unnecessary pulling.
The Bottom Line on Grey Hairbrush Fuzz
The grey fuzz in your hairbrush is usually a routine mixture of shed hair, skin cells, scalp oil, dust, lint, and styling-product residue. It may not be pleasant to look at, but it is a predictable result of regular grooming rather than a reason for alarm.
Removing loose hair often and washing the brush periodically can make a noticeable difference. A clean brush is easier to use, less likely to redistribute visible residue through the hair, and more likely to stay in good condition over time. With warm water, a small amount of shampoo, and a few minutes of gentle cleaning, most washable brushes can be refreshed easily.
If you notice persistent scalp itching, flaking, redness, pain, or unexpected hair loss, it is important not to assume the brush is the sole cause. These symptoms can have many explanations, and a dermatologist or other qualified healthcare professional can provide individual advice.
Sources
Disclaimer: This content is intended for entertainment purposes only and is not based on real events.