How to Make a Rustic Cornucopia from Brown Paper Bags and Foil
Introduction: Transforming Everyday Materials into Crafts
Crafting seasonally inspired decor can be both simple and rewarding, especially when it involves turning everyday items into impressive centerpieces. Among these projects, creating a rustic cornucopia using brown paper grocery bags, foil, glue, and water stands out for its charming transformation. Through a series of basic steps, plain paper becomes soft and pliable, drying into a unique, sturdy shape that evokes an old-world harvest basket. This project is ideal for those seeking to make something both decorative and meaningful without needing specialty supplies or tools.
Crafts that repurpose household materials encourage creativity and sustainability. The cornucopia, symbolizing abundance and gratitude, is especially popular during autumn and holiday seasons. This craft taps into those themes, providing a hands-on experience that adults and children alike can enjoy. The process emphasizes patience with soaking and drying, but the results are well worth the effort and can become a lasting addition to your home decor.
Background: The Significance of the Cornucopia in Seasonal Decor
The cornucopia, or “horn of plenty,” has deep historical roots in Western culture. Traditionally, it represents harvest bounty and prosperity, appearing on Thanksgiving tables and autumn displays across North America and Europe. Originating from ancient Greek mythology, the cornucopia was often depicted overflowing with fruits, grains, and flowers, symbolizing nourishment and abundance.
In contemporary decor, cornucopias are commonly crafted from woven materials like wicker, but inventive versions using paper or recycled goods are increasingly popular for their accessibility and environmental friendliness. Such projects not only celebrate cultural traditions but offer opportunities for family bonding and creative expression.
Materials Required
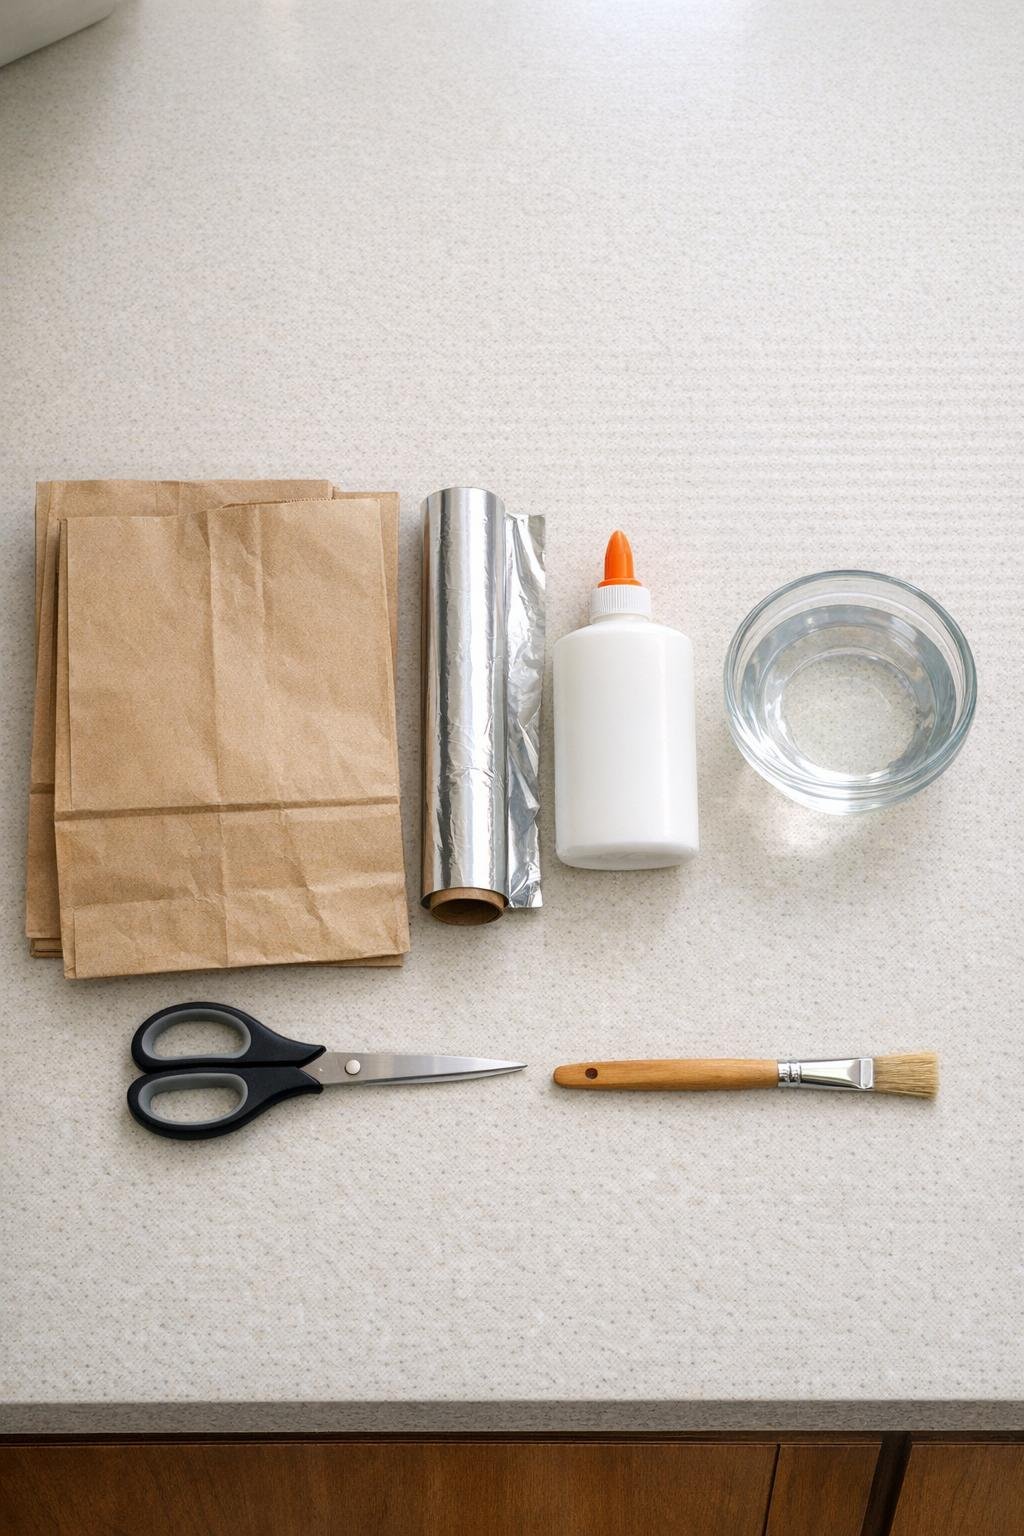
- 2 brown paper grocery bags (handles removed)
- 1 standard roll aluminum foil (75 square feet recommended)
- 1 bottle white glue (8 ounces)
- 2 cups water, divided
- 1 sink or large basin, filled with 3–4 inches of water for soaking
- Medium-sized scissors
- Paintbrush (1 to 1.5 inches wide)
All of these materials are easily found in most households or local stores, making this project both economical and accessible. Experts, such as craft educators from organizations like Martha Stewart Living, recommend opting for thicker brown bags for increased durability, and using non-toxic glue suitable for all ages.
Step-by-Step Instructions
Preparing the Paper and Foil
- Remove handles and any stiff bottom folds from the grocery bags. Open the bags flat, allowing easier soaking, tearing, and shaping.
- Crumple sheets of aluminum foil into a horn shape about 14–16 inches long. One end should be wide, while the other narrows and curls gently for an authentic look.
- Use your hands to smooth and compress the foil horn, ensuring it holds its shape. Flatten the open end into an oval, a classic feature of the traditional cornucopia form.
Transforming Paper into Rope
- Fill a sink or basin with water. Dip sections of the bag paper in for a short time, just until they turn limp. Remove immediately and gently wring to prevent dripping while maintaining flexibility.
- Test a soaked piece by tearing it into strips (1.5–2 inches wide). Twist each piece into a loose rope. If the paper breaks down, reduce soak time—quick dips are key.
Building the Cornucopia Structure
- Continue soaking, wringing, tearing, and twisting additional strips, working in small batches to keep paper strong.
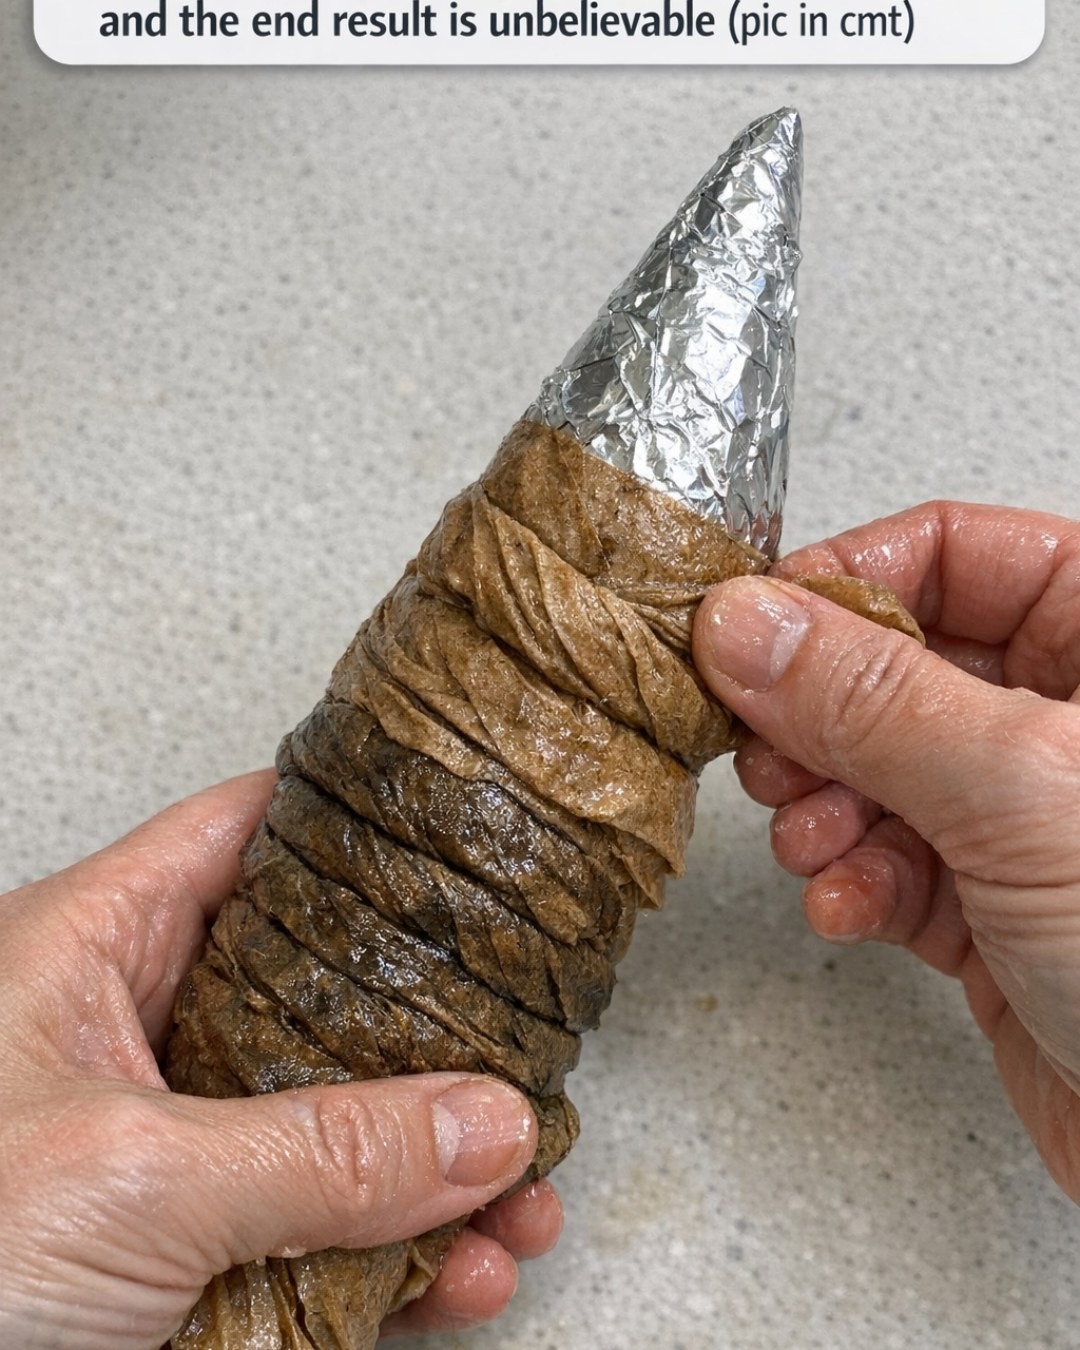
- Start at the curled tip of the foil horn, wrapping a twisted paper rope around it. Pinch the starting point in place, coil snugly so foil shows only where coverage has not yet been completed.
- Overlap strips by 1–2 inches, constantly coiling around the horn, pressing each round close for a continuous textured surface.
- Towards the wider end, angle the coils and use longer strips for a smooth, gap-free finish.
- Extra wet paper can be folded and wrapped around the rim of the horn for thickness. Coil one more strip around the edge for a sturdy, finished mouth.
- Mix ½ cup white glue with ½ cup water. Using a paintbrush, coat the entire paper surface with this mixture, working it into creases and overlaps but avoiding excessive wetting to prevent sagging.
Drying and Final Shaping
- Set the cornucopia in a stable position with the mouth slightly raised. Allow it to dry completely—this may take 24–48 hours. The paper will lighten and firm up as it dries.
- Once dry, carefully loosen and remove the foil from inside through the open end, leaving a hollow paper shell intact.
- If any weak spots or seams appear, patch them with additional wet twisted strips and glue mixture, then allow to dry thoroughly again.
Expert Recommendations and Tips
Ensuring Durability and Artistry
Craft experts highlight several strategies for maximizing both durability and visual appeal:
- Fuller Look: Use a wider foil base and thicker twisted strips near the opening for a more robust appearance.
- Paper Tears Easily: Soak paper minimally; a quick dip is sufficient. The paper should be limp but not pulpy.
- Extra Strength: Brush a second coat of glue-and-water after the first dries for enhanced durability, especially if intending to reuse the cornucopia annually.
- Darker Finish: Once the cornucopia is fully dry, lightly brush a thin wash of brown craft paint over the surface. The color will settle into twists for added rustic effect.
Decorating and Styling
To showcase the finished cornucopia:
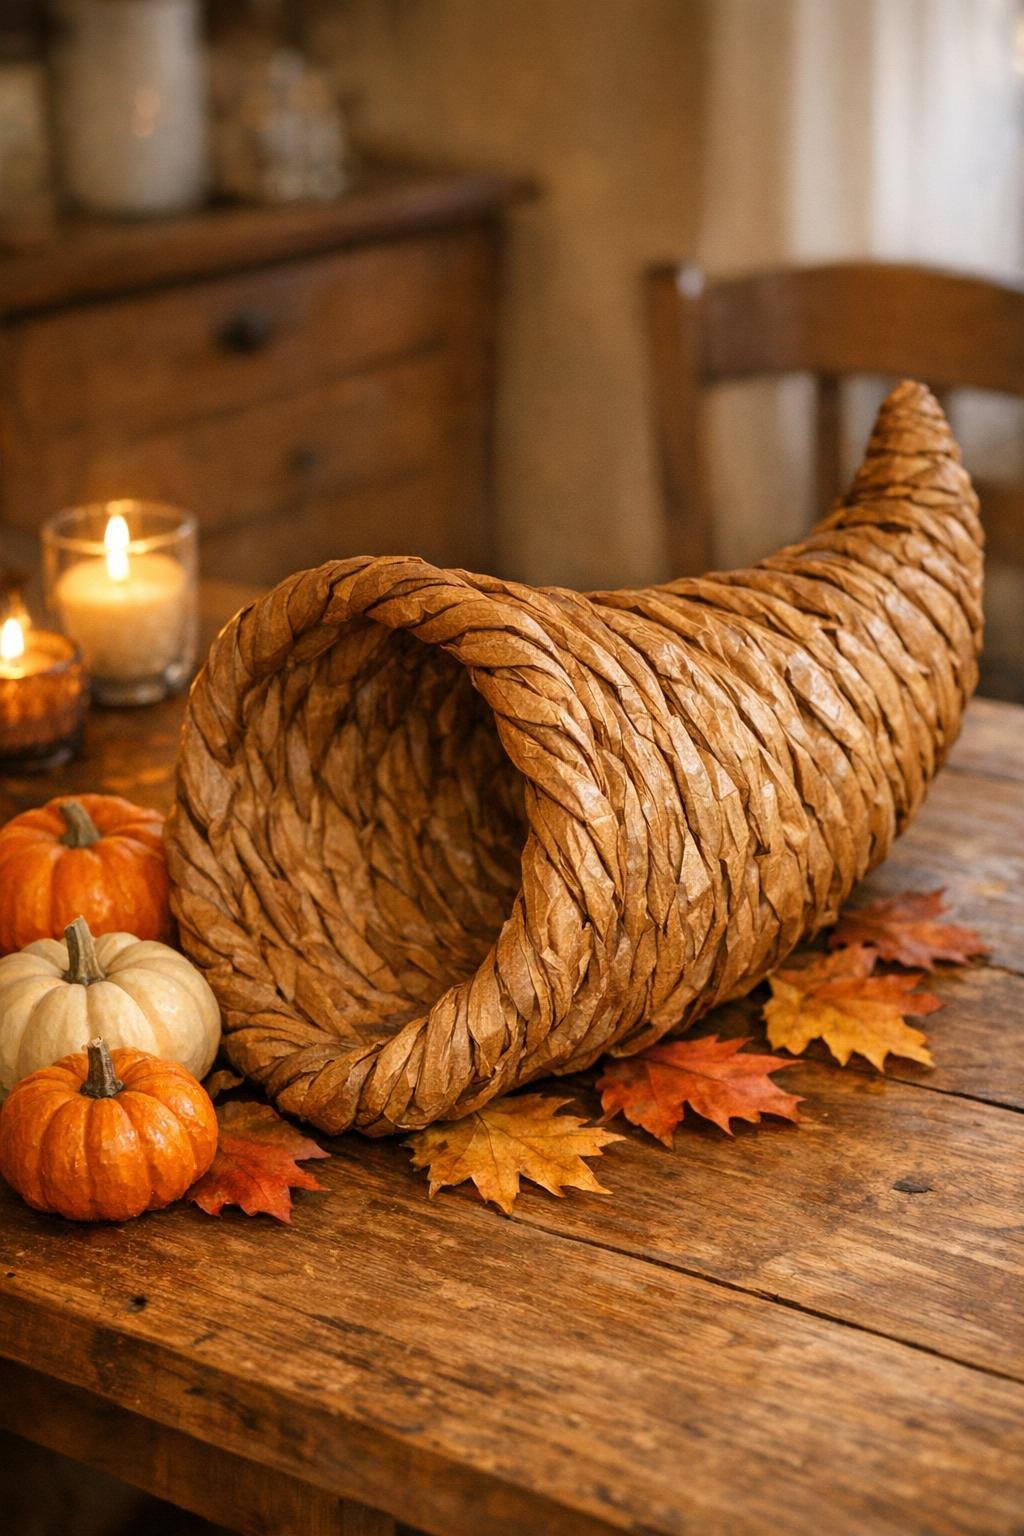
- Fill with faux leaves, mini pumpkins, pinecones, or rolled cloth napkins. Soft, lightweight decorations maintain the shape and integrity.
- For family tables or festive gatherings, pair with fabric accents or seasonal ornaments for enhanced atmosphere.
Proper Storage and Longevity
After completion, store your cornucopia in a dry area and avoid heavy objects pressing against the tip. Although the craft is surprisingly sturdy, handmade paper decor remains sensitive to prolonged moisture or weight. Properly cured, this piece can last through many seasons, becoming a cherished element of your annual celebrations.
Context: Sustainable Crafting and Global Trends
The global crafting community has increasingly adopted eco-friendly practices by repurposing materials. Projects like this cornucopia not only reduce waste but also foster creativity with minimal environmental impact. Educational resources from sites like BBC’s Science & Environment encourage the use of sustainable materials in home crafts.
Internationally, seasonal decor traditions vary, but the emphasis on handmade items is universal. Whether in North America, Europe, or other regions, DIY crafts play a key role in celebrating cultural holidays and bringing families together. Experts note that crafting with recycled materials fulfills dual purposes: it teaches resourcefulness and instills respect for the environment.
Summary: Why Make a Rustic Paper Cornucopia?
Creating a rustic cornucopia from everyday materials is an accessible, enjoyable project with lasting benefits. The process is simple, requiring only basic supplies and patience. The result—a textured, sturdy piece—adds warmth and seasonal charm to any setting, embodying historical and cultural significance. Expert tips help customize the cornucopia to individual tastes, while careful storage ensures it can be used year after year.
By crafting with recycled materials, individuals not only beautify their homes but also embrace eco-friendly values. As trends move toward sustainable decor, this project remains timely, practical, and deeply meaningful.
Sources
- Reuters – Crafts and Seasons
- BBC – Science & Environment
- The Guardian – Home & Garden
- Martha Stewart Living
Disclaimer: This content is intended for entertainment purposes only and is not based on real events.